picalili

picalili

Wednesday, 22 January 2014

Module two Animal Magic collecting visual information

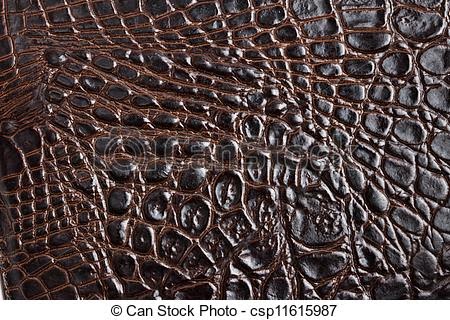
crocodile: strong, fierce,fear,leather,tough,beady eyed,silent, aggressive, rough, pointy,sharp,textured


Elephant: saggy,baggy,dry,wrinkled,plodder,big,,follower,noisy, rough,textured,weathered,memory,cracked,loose,mature


Giraffe: elegant,spindly,wide eyed, smooth,stretched,patterned


Leopard: graceful, silent, predator,sly,smooth,sleek,sharp,dangerous,fast,patterned


snake: slither,scales,smooth,poison,long,slim,rattle,sharp,bite,textured,coils,slither


Zebra: sleek,stripes,patterned


Cheetah: Sleek, uneven spots,fast,feline,smooth,patterned


Tiger: Fierce, roar,smooth,silent,feline,endangered,teeth, muscular,powerful,solitary, svelte,patterned

Good old Google and the National Geographic website, plenty of visuals for me to get started with this new module.

I decided to have a quick go at sketching small areas of the skins, I only had a pencil to hand but thought I would have a quick go any way. Here's the result.


Tuesday, 21 January 2014

Resolved sample reworked and self evaluation of module one City and Guilds Certificate Embroidery

Sian made a few suggestions of ways to integrate the shapes more, so with a few more slashes and stitches through the stars the piece is now complete. I need to go shopping to get some mount board but for now it is just attached to a piece of cream card with spray mount.

 Self evaluation
Question: What might I have done differently along the making process of this piece?

Probably everything. I would have not used paper, I love working with up cycled bits, but fabrics would have given me a more distressed surface. 
Overall my self evaluation of the module, is that I took too long to finish and for me leaving big gaps of time in between posting and stitching is not a good way to work. Once I had put things away it was then difficult to get started again and I had to keep backtracking over previous samples and chapters to remember what I had learnt. I know I have a tendency to let my mind wander off in other directions, so for the next module I hope to be able to let myself focus on each chapter more and work at a more consistent pace. I have leant a lot from this first module though and love the online community of the Distant Stitch group too.

Friday, 17 January 2014

Module 1 Chapter 12 Study of 3 Artists

HERTA PULS (1915-)
I had not heard of Herta Puls until I started studying with Distant Stitch, so I decided I would try and research her work as the module progressed. When I typed Herta’s name into Google I found a lot of information but most of the posts were written by Distant Stitch Students. I wanted to put together my own research rather than use that of others ,so my first port of call was Amazon where I purchased The Art of Cut Work and Applique Batsford 1978 from a second hand seller I hoped that this along would help me find out a little more about Herta as well as giving me examples into the technique of mola which look stunning
Herta came to England as a qualified German radiographer and medical technician in 1939. Here she became a student of embroidery and textile design winning numerous prizes and medals, she also became a member and exhiibited with  Group 62 and later became a teacher and lecturer. “She takes her Inspiration from drawings of objects in nature and on travel is interpreted by layered appliqué (mola-work). Layered threads and embroidery, hand or machine stitched; using 100% cotton-poplin, thai-silk, hand made paper, embroidery threads, fabric-paints and dyes.” (Craft Council Directory).
Heta began her research into the Kuna Indians and their textiles in the late 1960's. This reasearch led to the publication in 1978 of her book “The Art of Cutwork and Applique – Historic, Modern and Kuna Indian”. 

Mola
The mola forms part of the traditional costume of a Kuna woman, two mola panels being incorporated as front and back panels in a blouse. The full costume traditionally includes a patterned wrapped skirt (saburet), a red and yellow headscarf (musue), arm and leg beads (wini), a gold nose ring (olasu) and earrings in addition to the mola blouse (dulemor).
In Dulegaya, the Kuna's native language, "mola" means "shirt" or "clothing". The mola originated with the tradition of Kuna women painting their bodies with geometrical designs to represent humans, animals and plants, using available natural colours, in later years these same designs were woven in cotton, and later still, sewn using cloth bought from the European settlers of Panama.


The oldest molas that remain usually have three layers – often black, red and yellow – and the designs were simple stylized geometric human, animal and plant forms. More modern molas have up to 5 layers, and often include extra small pieces tucked in to a particular area. This appears to have given rise to blocks of vertical lines being worked to reduce the bulk of the fabric which was making it less practical to wear and work in.
The two examples below both come from the Pitt Rivers Museum in Oxford. Neither are early examples, but the first is typical of the all-over geometric design often seen in early molas. The second example is thought to have been made in the 1960s and has a larger central motif and more colours than earlier molas. It also shows the blocks of vertical lines.


Michael Brennand Wood  visual artist, curator, lecturer and arts consultant.

I went to the Eastern Regional Embroiderers Guild Day earlier this year where  Michael was one of the speakers.

Michael explores 3 dimensional line, structure and pattern and  integrates textiles with other media. Recent work has been inspired by traditional floral imagery but uses computerised machine embroidery,collage, paint, wood, glass and toy soldiers purchased in their hundreds from his local toy store.
His work can be seen worldwide including the Victoria and Albert Museum, the 21st Century Museum of Contemporary Art, Kanazawa and National Gallery of Australia, Canberra. 
He won The Creative Concept Award in 1987 and The Fine Art Award in 1989 at the International Textile Competition in Kyoto, followed by the first RSA Art for Architecture Award 1990.


In 1982 he curated the controversial exhibition ‘Fabric and Form’ and co-curated the ‘Makers Eye’ both for the Crafts Council, followed in 1992 with ‘Restless Shadows’ a major Goldsmiths College touring exhibition of contemporary Japanese Textiles. Until 1989 he was a senior lecturer in the department of visual art at Goldsmiths College, University of London. He has taught extensively in colleges and universities in the UK and overseas, and has undertaken residencies in Japan, Australia, New Zealand, Canada, and Belgium. He was appointed Visiting Professor at Manchester Metropolitan University in 2005 and is Research Fellow at the University of Ulster.


KANDINSKY (1866-1944)
Kandinsky was a painter who sometimes used free and unusual star and cross shapes in his later work. His abstract paintings in the 1920’s show compositions of shapes that swirl and fly across the canvas. In his teaching, Kandinsky laid stress on colour and forms in space, from the simple shapes such as the triangle, the line and the circle. His shapes were over-laid to create movement and depth in his work.


Biography

Born in Moscow in 1866, Kandinsky spent his early childhood in Odessa. His parents played the piano and the zither and Kandinsky himself learned the piano and cello at an early age. The influence of music in his paintings cannot be overstated, down to the names of his paintings Improvisations, Impressions, and Compositions. In 1886, he enrolled at the University of Moscow, chose to study law and economics, and after passing his examinations, lectured at the Moscow Faculty of Law. He enjoyed success not only as a teacher but also wrote extensively on spirituality, a subject that remained of great interest and ultimately exerted substantial influence in his work. In 1895 Kandinsky attended a French Impressionist exhibition where he saw Monet's Haystacks at Giverny. He stated, "It was from the catalog I learned this was a haystack. I was upset I had not recognized it. I also thought the painter had no right to paint in such an imprecise fashion. Dimly I was aware too that the object did not appear in the picture..." Soon thereafter, at the age of thirty, Kandinsky left Moscow and went to Munich to study life-drawing, sketching and anatomy, regarded then as basic for an artistic education.
Ironically, Kandinsky's work moved in a direction that was of much greater abstraction than that which was pioneered by the Impressionists. It was not long before his talent surpassed the constraints of art school and he began exploring his own ideas of painting - "I applied streaks and blobs of colors onto the canvas with a palette knife and I made them sing with all the intensity I could..." Now considered to be the founder of abstract art, his work was exhibited throughout Europe from 1903 onwards, and often caused controversy among the public, the art critics, and his contemporaries. An active participant in several of the most influential and controversial art movements of the 20th century, among them the Blue Rider which he founded along with Franz Marc and the Bauhaus which also attracted Klee, Lyonel Feininger (1871-1956), and Schonberg, Kandinsky continued to further express and define his form of art, both on canvas and in his theoretical writings. His reputation became firmly established in the United State s through numerous exhbitions and his work was introduced to Solomon Guggenheim, who became one of his most enthusiastic supporters.
In 1933, Kandinsky left Germany and settled near Paris, in Neuilly. The paintings from these later years were again the subject of controversy. Though out of favor with many of the patriarchs of Paris's artistic community, younger artists admired Kandinsky. His studio was visited regularly by Miro, Arp, Magnelli and Sophie Tauber.
Kandinsky continued painting almost until his death in June, 1944. his unrelenting quest for new forms which carried him to the very extremes of geometric abstraction have provided us with an unparalleled collection of abstract art. Web Museum: Kadinsky.


Thursday, 16 January 2014

Resolved sample


Three layers were hand stitched using running stitch of varying lengths,this was then pt onto another piece of fabric as backing and the hand stitched red star applied. Scrim was used to create the other star shape,so that it could be removed thread by thread or pulled apart to reveal what's beneath.
Finally the whole pierce was slashed in various places, to try and a distress to the whole piece.
I am not overlly happy with this piece and know that I have left far too big a gap in between the last post and this one. 

Finally a really bad picture of me, there's no one around at the moment to take a photo of me working so I tried to take one of myself.


Friday, 25 October 2013

Chapter 12


thought I would have a play around in photoshop with one of my favourite coloured paper pieces. here are the results


I have only just started using photoshop, but I am quite please with the results, I know there is so much more that it can do. So my first idea for my resolved sample is one of these.


Playing around with paper shapes on brown paper. I decided to develop this idea further with fabric, paper and stitch.


Firstly I appliqués some lace stars onto brown paper and blue sheer fabric as the backing, I then added machine stitched circles all over the piece.

Sian had suggested taking my circle idea further and try to create star like shapes from the overlapping circles. I tried this out in an earlier sample but wasn't particularly happy with the results, I didn't like the regularity of the shapes I had formed. This time however the star shapes are not that clear to see.


Here is the reverse of the piece.


The piece was then painted using fabric paints, rinsed under the tap and rubbed to create holes, heat gun was the applied to distress. The lace and paper. No to leave it to dry and the maybe add some hand stitching. I feel this type of technique could be used to make a distressed Turkish textile tile. It would need to be symmetrical rather than random as it is here.


Tuesday, 22 October 2013

Chapter 11 Disintegrating stitches


Following my feedback from Sian, I will return to the disintegrating papers and stitching but firstly a few photos of the reverse of the disintegrated stitched samples.


All the samples are the same size but for some reason the ipad doesn't seem to thinks so. It's quite interesting looking at the back of these hand stitched pieces, not something I had considered before. I am sure traditional hand embroiderers would be horrified at the tangled mess at the back of my work though!!


Disintegrated designs grouped together


Sian also suggested going back to the stitched circles and trying to create star like shapes by overlapping the circles.

First attempt....


Circles drawn onto one sheet of brown paper,were then machine stitched
Here's the result after some stitching.

Then I decided to add some water. Big mistake golden rule when making lace like fabric....join all shapes. Here's the result,so back to the drawing board.
Messy and not what I wanted at all.

Attempt number two
This time I used smaller circles and more of them.


Now to add some machine stitching.


Reverse side


I then added some oil and rubbed at it until it started to disintegrate. This took some time because I had used 2 pieces of brown paper to support all the stitching. Here's the finished piece, I think next time I would go with one piece of paper and water rather than the oil or another option could be to oil the paper first and then stitch into it.... Maybe


Wednesday, 16 October 2013

Chapter 11 resolved sample growth and disintegration paper samples


A. Paper was crumpled until it began to disintegrate. The paper becomes quite soft during this process


B. paper was first crumpled and then the edges were burnt using a candle. I worked right next to the window while doing this. It gives a good aged look to the paper but not the safest!


C. Disintegration is achieved using a hole punch, it created quite an even pattern to begin with, but by folding it in various ways I was able to make it look a little more organic than it did originally.


D. Simple tearing only.


E. Stabbed with a pencil.


F. Crumpled paper was rubbed up and down a cheese grater.


G. Momigami (from Cas Holmes book The Found Object). Oil applied to paper which is then kneaded in the hands until it becomes much softer but also much stronger. There are a few small tears beginning to appear in the piece,although they don't show up well in the picture above.


H. An even grid was stitched onto brown paper,soaked in water an distressed.


I. This time I tried an uneven grid,lots of free machining in all directions, making sure that the areas were all connected.


J. Brown and sprayed silver paper layered,small pieces of sheers were incorporated as I free machined. I found it easy to work in circles for this type of exercise but it doesn't fit with this module. However I loved doing this and I am sure I will return to it again as the course progresses.


K. Going right back to my original line drawings I had wanted to use the poppy shape and felt I should try it out on a paper sample. Firstly I created a grid of circles and then using free machining in zig zag and straight stitch I created poppy like patterns within each circle. The piece was then soaked in water and distressed. While it was still wet I added some koh-i-noor dye into the middle of the poppy seed head shapes. It was the left to dry.

SECOND THOUGHTS-paper shapes
First of all I tried to make a poppy seed head shape to disintegrate but this was too complex

I felt this would be to complicated to work with so after looking back through my samples and work sheets I found a much simpler shape that I have used several times. "Keep it simple" I had been told that before by Sian at the beginning of this module. After drawing the same shape onto the back of each square I "cut"out the shape by tearing it. Here is the series I created I love the last highly disintegrated shape.


THIRD THOUGHTS - different ways of disintegrating a square of fabric.


Top left: snips into the middle of the fabric in cross shape frayed.
Top right: holes made with scissors are the pulled apart and threads removed.
Bottom left: 8 point star cut with scissors and then frayed.
Bottom left simple cross shape frayed.

Summarising different ways of making a shape disintegrate or grow. I decided to see how I could make a simple star shape look as if it was disintegrating by using only hand stitches.


1. I used a variety of hand dyed and bought threads to work long and short stitches to cover the whole shape and raise the surface too.


2. Straight stitches used again but gaps left to give the illusion of disintegration.


3.French knots were stitched randomly around the edge of the shape with only a few added into the shape.


4. The shape was stitched in long stitched held down by stitching and then cut through.