A. Paper was crumpled until it began to disintegrate. The paper becomes quite soft during this process
B. paper was first crumpled and then the edges were burnt using a candle. I worked right next to the window while doing this. It gives a good aged look to the paper but not the safest!
C. Disintegration is achieved using a hole punch, it created quite an even pattern to begin with, but by folding it in various ways I was able to make it look a little more organic than it did originally.
D. Simple tearing only.
E. Stabbed with a pencil.
F. Crumpled paper was rubbed up and down a cheese grater.
G. Momigami (from Cas Holmes book The Found Object). Oil applied to paper which is then kneaded in the hands until it becomes much softer but also much stronger. There are a few small tears beginning to appear in the piece,although they don't show up well in the picture above.
H. An even grid was stitched onto brown paper,soaked in water an distressed.
I. This time I tried an uneven grid,lots of free machining in all directions, making sure that the areas were all connected.
J. Brown and sprayed silver paper layered,small pieces of sheers were incorporated as I free machined. I found it easy to work in circles for this type of exercise but it doesn't fit with this module. However I loved doing this and I am sure I will return to it again as the course progresses.
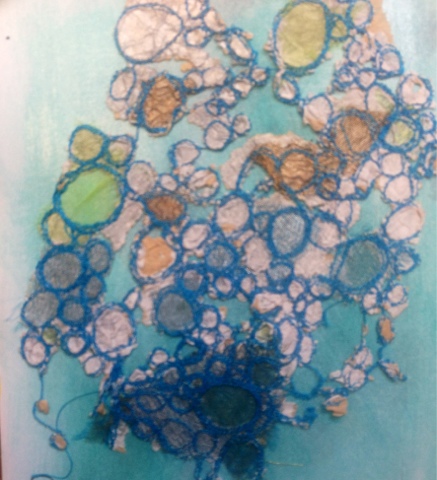
K. Going right back to my original line drawings I had wanted to use the poppy shape and felt I should try it out on a paper sample. Firstly I created a grid of circles and then using free machining in zig zag and straight stitch I created poppy like patterns within each circle. The piece was then soaked in water and distressed. While it was still wet I added some koh-i-noor dye into the middle of the poppy seed head shapes. It was the left to dry.
SECOND THOUGHTS-paper shapes
First of all I tried to make a poppy seed head shape to disintegrate but this was too complex
I felt this would be to complicated to work with so after looking back through my samples and work sheets I found a much simpler shape that I have used several times. "Keep it simple" I had been told that before by Sian at the beginning of this module. After drawing the same shape onto the back of each square I "cut"out the shape by tearing it. Here is the series I created I love the last highly disintegrated shape.
THIRD THOUGHTS - different ways of disintegrating a square of fabric.
Top left: snips into the middle of the fabric in cross shape frayed.
Top right: holes made with scissors are the pulled apart and threads removed.
Bottom left: 8 point star cut with scissors and then frayed.
Bottom left simple cross shape frayed.
Summarising different ways of making a shape disintegrate or grow. I decided to see how I could make a simple star shape look as if it was disintegrating by using only hand stitches.
1. I used a variety of hand dyed and bought threads to work long and short stitches to cover the whole shape and raise the surface too.
2. Straight stitches used again but gaps left to give the illusion of disintegration.
3.French knots were stitched randomly around the edge of the shape with only a few added into the shape.
4. The shape was stitched in long stitched held down by stitching and then cut through.